Pages

Showing posts with label coverstitch. Show all posts

Tuesday, October 2, 2012

Heart 'n Bones Renfrew

Wow this post is a long time in the making. You can see the first glimpse of my Renfrew way back here! Yikes! I still wear it regularly. I love the fabric and the idea of a simple t-shirt. However, the shape doesn't curve quite right with my measurements, and it is not long enough. I have a long torso. I plan to improve this the next time around. 


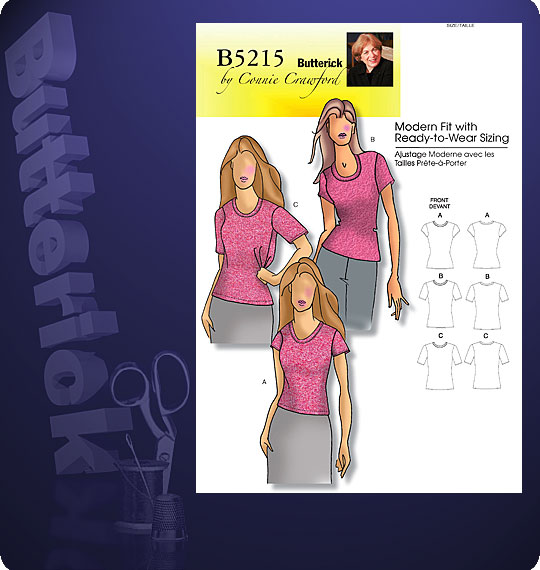
A few years ago I made a t-shirt (unblogged) from this Connie Crawford pattern here, B5215. (I should blog it because these patterns get such a bad rap and I had a wonderful experience with it)  I made the extra small and it fit my curves and everything wonderfully! And it was the right length! However it only has the scoop neck option.


For my next Renfrew, I will use the bodice from B5215 for the bodice of the Renfrew and then use all the other options the Renfrew has to offer. That will give me the right length and shape and then the options for the other necklines and sleeves. I think it will be the perfect combination!

For my Renfrew, I used this fabric from Mood here.
Fabric closeup of cute hearts and bones!

I discovered this fabric from this patternreview. Now the eagle eyed among you would realize that this review is from none other than my friend Nhi! However, I never met Nhi until the garment district shopping trip mentioned above and in the blog post written here. I showed up to shop in my Renfrew and Nhi exclaimed she had the fabric! I didn't realize that it was her review that had shown me the fabric and led to me buying it! What a small world! Crazy coincidence! 

The second I saw this fabric in her review, I had to have it. Those of you who follow my blog know my love of Halloween and skulls and then also hearts and stars. This fabric was a natural! I had to get it!  I still have plenty left...I used under a yard on my Renfrew since I cut the bands in a black matte jersey from Joann's. I will definitely be using more!


After attaching the bands according to the instructions, I topstitched using the coverstitch portion of my Babylock Evolve serger to hold the band seam allowances down. 


Overall, this was a simple and easy make that I made entirely on my serger. (Except for the one part of the v-neck band that had to be stitched by sewing machine.)  I cannot wait to make a cowl collared one for the cooler weather that is coming!
In this closeup you can see how the curves don't quite match the
curviness of my waist to my hips and that as a result it rides up


Not that you need any encouragement, since this shirt has been made by nearly every sewing blogger, but just in case you haven't made it yet...go for it!

My pattern review can be seen here.

Thursday, March 22, 2012

Coverstitch Tutorial


In my previous post, I mentioned giving you all a tutorial on the method I used for coverstitching. I only recently discovered this method and it has made such a difference!  I used to just eyeball the coverstitch and trim any excess fabric from the back. But with this method, you coverstitch on the correct spot every time and there is no trimming necessary!  The underside is perfectly covered because you stitched in exactly the right spot. So here is how:

I used the seam guide attachment for my serger but you can just as easily use a pad of post its or painters tape to mark the spot. So first you need to get one of these items. For those who are not sure what your seam guide attachment looks like, here is a picture.
Seam guide attachment with screws that attach the seam guide to the machine
After you have this, take your item with the hem already pressed or fused into place.  Then put it WRONG SIDE UP underneath the presser foot to gauge the right spacing to align your stitches to your raw edge.

see how my raw edge is aligned exactly where the two needles with the thread will hit?
Once you have it perfectly aligned, tighten the screws on your seam guide or stick your post its or painters tape exactly at the right edge of your hem.

here is the post-it pad aligned

here is the seam guide aligned and screwed down
 Now that you have your alignment exact, flip your fabric over so the RIGHT SIDE IS UP...the way you want to coverstitch. Align the right side of the hem with your mark. (Either the post-its, tape, or seam guide)
fabric flipped over and aligned with the guide
Now you can begin to coverstitch while keeping your hem aligned with your mark. The stitches will end up exactly on the edge of your hem because you already checked the alignment ahead of time!
me stitching my faux hem
Here is a picture of my finished "hem".
wrong side--see how the edges are caught perfectly? No need to go back and trim!
Front side...perfect coverstitch!

Piece of cake right?  I can't believe I was ever just eyeballing it!  This method makes it so much easier!  I hope this helps. Let me know if you have any questions...I'll be happy to clarify!

Happy Coverstitching!


Tuesday, March 20, 2012

Giorgio's Top

Part of the new Spring line from Silhouette patterns included this top, called Giorgio's Top. For those of you who are not familiar, Peggy Sagers (designer of Silhouette patterns) makes no secret of how there are no copyrights in fashion and she picks clothing items she likes from designer lines and remakes them as patterns for her line. (Check out her trench pattern---its the Burberry design!) This top is one from the runway of Giorgio Armani--hence the name Giorgio's top. It is essentially a basic princess seamed t-shirt with a cute flared peplum at the bottom.

I made the smallest size, size 1, and it is slightly big. I also made it completely on my serger. I just lined up all the pieces and serged down the seam. Next time I might take slightly deeper seam allowances...but it is probably only big because I used a slinky knit. I used this sparkle pumpkin slinky knit from fabric.com. I bet it will fit perfectly when I use a regular knit next time. Also, I am long waisted and love my shirts long...but even this one is a little too long. I may take off 1/2 of an inch next time. I also think my slinky knit was a little heavy (huh? normally they are so light!) to convey the peplum to the extent on the pattern picture. I will use a real lightweight knit next time as I love that feature. So hmm...maybe it wont pull down as long in a lighter weight knit so maybe I should not cut off any length until I see how low it pulls.

Per the instructions, I just folded under the sleeves and neck hem and top stitched using the coverstitch on my serger. For the hem, I used this 1 inch knit tape from Emma Seabrooke, and put it fusible side UP (away from wrong side of fabric), on the inside of the hem, and serged all around. Then I folded up that 1 inch hem, and fused it in place. Next I took it to my serger and cover stitched. (Please note that this tape does come in double sided fusible, I just happened to have this one sided in my stash already) I like the feel of hems on knits with this tape because it gives them a little body and keeps them from rolling in light weight knits.
back view
side view


Close up of front--that weird pucker is the shirt going over the button on my jeans

Stay tuned for my next post which will be a tutorial on the great method I used to coverstitch the hems. It makes everything line up perfectly on the back! No trimming required.

You can see my review of Giorgio's Top here.

Locations of Site Visitors