Pages

Showing posts with label skull. Show all posts

Wednesday, November 21, 2012

Halloween Wedding Wednesday-The Groomsmen


It might be easy to forget about the groomsmen and the groom when doing a Halloween wedding and a bunch of DIY but Halloweening up the groomsmen was so much fun! It all started with my favoritest fabric that I ever found...and I only bought four yards! This was three years ago and I cannot find any more of it....I even tried the Find My Fabric website..but nothing! I check Joann's every year during the Halloween season (where I originally got it) for more...but no luck yet.


It is a polyester black fabric with glittery skulls all over it....so much fun! So we used this amazing fabric for several things. First, I made the ties for the main groomsmen out of it..and one extra for my husband just for fun, but we ended up using that one extra for my father to wear the day of the wedding! I used an existing tie my husband had for the pattern. For the best man, we made a bowtie out of the fabric..so cute.

from left to right: groomsman 1, groom, best man (see bowtie?), groomsman 2


My father, getting into the Halloween mood, behind us wearing the extra tie..also my dad is extremely tall....we aren't midgets even though it might look so here :)
We had the groomsmen and bridesmaids as well as the parents of the bride and groom change immediately after the ceremony...they still wore costumes to the party!!

And what better way to make the groom stand out than by making his entire vest out of the fabric!! He wore a regular black tie but his entire vest was this sparkly fun fabric...he's such a good sport :) Instead of fitting a pattern to him, we used a vest that fit him and used that for the pattern. I also made it with an adjustable cinching in the back to make it easier to fit.

the handsome husband

After the ceremony he took his jacket off and the glitter rubbed off on guests and me all night!! It was awesome!

good view of vest and of the bustle on my dress


Oh no! I'm a ghost!!! (and you can see the vest)

extreme closeup of the vest while not being worn


I also made the ring cushion out of this fabric as well...I can do a tutorial on how I made it if you want, but it is just a pillow with a fabric covered button tufted in the middle with ribbon under it...but if it helps anyone, I can do it.

cute picture of my little nephew (dressed as a monkey!!) the ring bearer handing the cushion over


good closeup of pillow with ribbon ties in wedding colors

So what do you think? The men look pretty snazzy don't they???? The guys were all such good sports and wore the outfits well...and then really got into it with their costumes which were all fantastic...one groomsman even hand made his costume! Wait until you see it...it's pretty cool...

Tuesday, October 2, 2012

Heart 'n Bones Renfrew

Wow this post is a long time in the making. You can see the first glimpse of my Renfrew way back here! Yikes! I still wear it regularly. I love the fabric and the idea of a simple t-shirt. However, the shape doesn't curve quite right with my measurements, and it is not long enough. I have a long torso. I plan to improve this the next time around. 


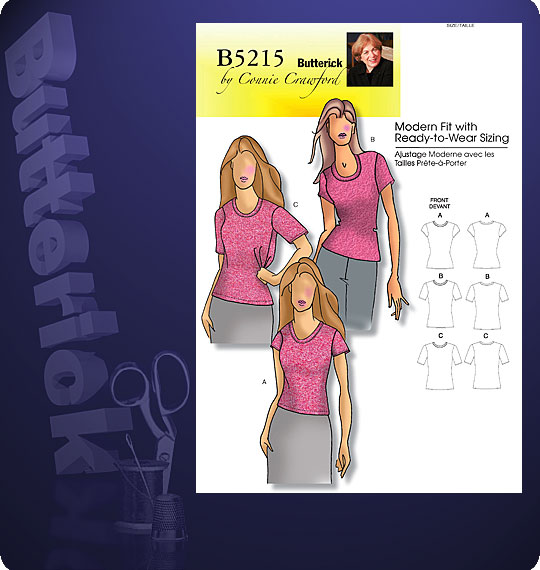
A few years ago I made a t-shirt (unblogged) from this Connie Crawford pattern here, B5215. (I should blog it because these patterns get such a bad rap and I had a wonderful experience with it)  I made the extra small and it fit my curves and everything wonderfully! And it was the right length! However it only has the scoop neck option.


For my next Renfrew, I will use the bodice from B5215 for the bodice of the Renfrew and then use all the other options the Renfrew has to offer. That will give me the right length and shape and then the options for the other necklines and sleeves. I think it will be the perfect combination!

For my Renfrew, I used this fabric from Mood here.
Fabric closeup of cute hearts and bones!

I discovered this fabric from this patternreview. Now the eagle eyed among you would realize that this review is from none other than my friend Nhi! However, I never met Nhi until the garment district shopping trip mentioned above and in the blog post written here. I showed up to shop in my Renfrew and Nhi exclaimed she had the fabric! I didn't realize that it was her review that had shown me the fabric and led to me buying it! What a small world! Crazy coincidence! 

The second I saw this fabric in her review, I had to have it. Those of you who follow my blog know my love of Halloween and skulls and then also hearts and stars. This fabric was a natural! I had to get it!  I still have plenty left...I used under a yard on my Renfrew since I cut the bands in a black matte jersey from Joann's. I will definitely be using more!


After attaching the bands according to the instructions, I topstitched using the coverstitch portion of my Babylock Evolve serger to hold the band seam allowances down. 


Overall, this was a simple and easy make that I made entirely on my serger. (Except for the one part of the v-neck band that had to be stitched by sewing machine.)  I cannot wait to make a cowl collared one for the cooler weather that is coming!
In this closeup you can see how the curves don't quite match the
curviness of my waist to my hips and that as a result it rides up


Not that you need any encouragement, since this shirt has been made by nearly every sewing blogger, but just in case you haven't made it yet...go for it!

My pattern review can be seen here.
Locations of Site Visitors