Pages

Showing posts with label Professional Tote. Show all posts

Wednesday, January 25, 2012

A Year's Break.....and yet another Professional Tote!

I'm back! I know I took a break for a year but I'm back and going to try to be more regular on posting my projects and also posting reviews on patternreview.com.  The reasons I left for so long, first I got engaged, then married, then honeymoon, then new job....it was all so crazy and blogging fell by the wayside!  I had a Halloween themed wedding on October 29, 2011 and it was incredible! I will post pictures periodically of things we did because it was sooo hard to find Halloween wedding resources and ideas. So if mine can help someone, that is great!


 Anyone who has read my blog from before knows my love of the Professional Tote (see here, here, and here) and I had already made two! Well I made a third last year for my brother to give to his girlfriend on Valentines Day. This one was my favorite of them all.
front
back

I used notions from the Creative Thimble's website (the designer of the pattern) for this bag. I also used her purse feet which work extremely well for this pattern seeing as it is a travel bag and is frequently set on the ground. I also used her cording in lime green, the cord stops in lime green, and the special zipper. This zipper is far more heavy duty and works much better to close up the top of the bag.
heavy duty zipper and decorative stitching
I also used decorative stitching on many of the pieces to add a bit more pizazz!  (As though the fabric was not pizazzy enough already!)
inside view
Everyone who I have made this bag for (myself, mother, and brother's girlfriend) have loved it to death and we use it every time we travel. Or for me, I use it when I go to shows as well to carry all my purchases!  As an update on the one I made well over a year ago--I still use it all the time and it has held up well. No problems whatsoever. Oh wait I lied. There is one problem. I did my embroidery on the front of mine with my initials. Only problem is, I since got married and now have new initials! Guess I have to make another one...... :)

On the next one I make, I intend to try to use this new product instead of the regular Decorbond interfacing. It is called Soft and Stable and I think will alleviate the problem of the fabric separating from the fusible decor bond around the top. (It is hardly noticeable but if I am making another...I may as well try to improve!)

I will also be posting a tutorial soon on how I do the hang ties on the zippers of all my bags so stay tuned!

You can see my review of this pattern here.

Tuesday, January 18, 2011

Holiday Insanity

In this post I am going to post nearly everything I made for the holidays as gifts  for people so you can see why I disappeared for nearly a month in recovery! This post will cover everything I made that I did not already post about. if it gets too long, I may have to split into two posts. Ready?  Here goes...


 Let's start with the Professional Tote. Yes, I have made several posts about this amazing bag,  and here is another one I made for the holidays. On this one, I added additional short straps to the top to accommodate the way my mother carries her luggage through the airport. The other straps would have been too long to use and the bag would have been dragging along the floor. So I added these little straps. And then below we have the back view.


Next, we have the Serged Satchel by Indygo Junction. I made this bag using Cappucino Bali Pops and YLI's candlelight thread in the loopers. This thread is truly sparkly and gorgous! It is too thick to go through a needle so you can only use it in the loopers of your serger, for couching, and in the bobbin for bobbinwork.
 
Next, I embroidered a makeup bag with a cute hearts and rickrack design. These makeup bags come in two sizes and a ton of different colors and are great for embroidery. Plus, they are lined with vinyl to make wiping down easy for when your makeup spills all over! You can get them from The Sewphisticated Stitcher.

I also made another purse like the one you saw previously in my Quilt with your Serger tutorial. However, with this one, I shrunk the pattern by 40% (so it is 60% of its original size) and then continued to construct the bag. I also added embroidery and hot fix crystals on this smaller version. You can get the pattern for this bag here.
This next photo is of a casserole carrier I made using insulated batting so it will keep any dish cold or hot. This insulated batting is called Insul-Bright and is great for use in your hot pads, iron cases, oven mitts, etc. Keep reading for another gift where I used this batting. 
 The inside ties with ribbons so it can accommodate many different sizes of casserole dishes. 

I also embroidered many ready-to-wear shirts with various embroidery designs I knew the designated gift receiver would like. If you want to know where I got any of these embroidery designs, leave a comment or contact me and I will tell you...I'm just worried this post will get obscenely long if I go through every design I used!

 For this next one, the gift receiver goes to University of Pittsburgh and I looked on their website and they make a hoodie and shirts with Pitt just like this! So I used a Varsity font and an applique/outline stitch and re-created it for her!


And what post would be complete without something about babies???  Here are two onesies I embroidered for very special boy babies. Love those alien designs!

The next item is a two zippered makeup pouch. I also sell these on my Etsy site here. They are custom made and totally functional and can hold so much! This case is always special made up in someone's name.
Now we have another Insul-Bright gift! Here are two sets of trivets I made. These are made in the embroidery hoop, quilting in all, in one hooping! I used fabrics to match the kitchens of the receivers and instead of using regular cotton or polyester batting, I filled them with the insulated batting. This way they can be used as trivets.

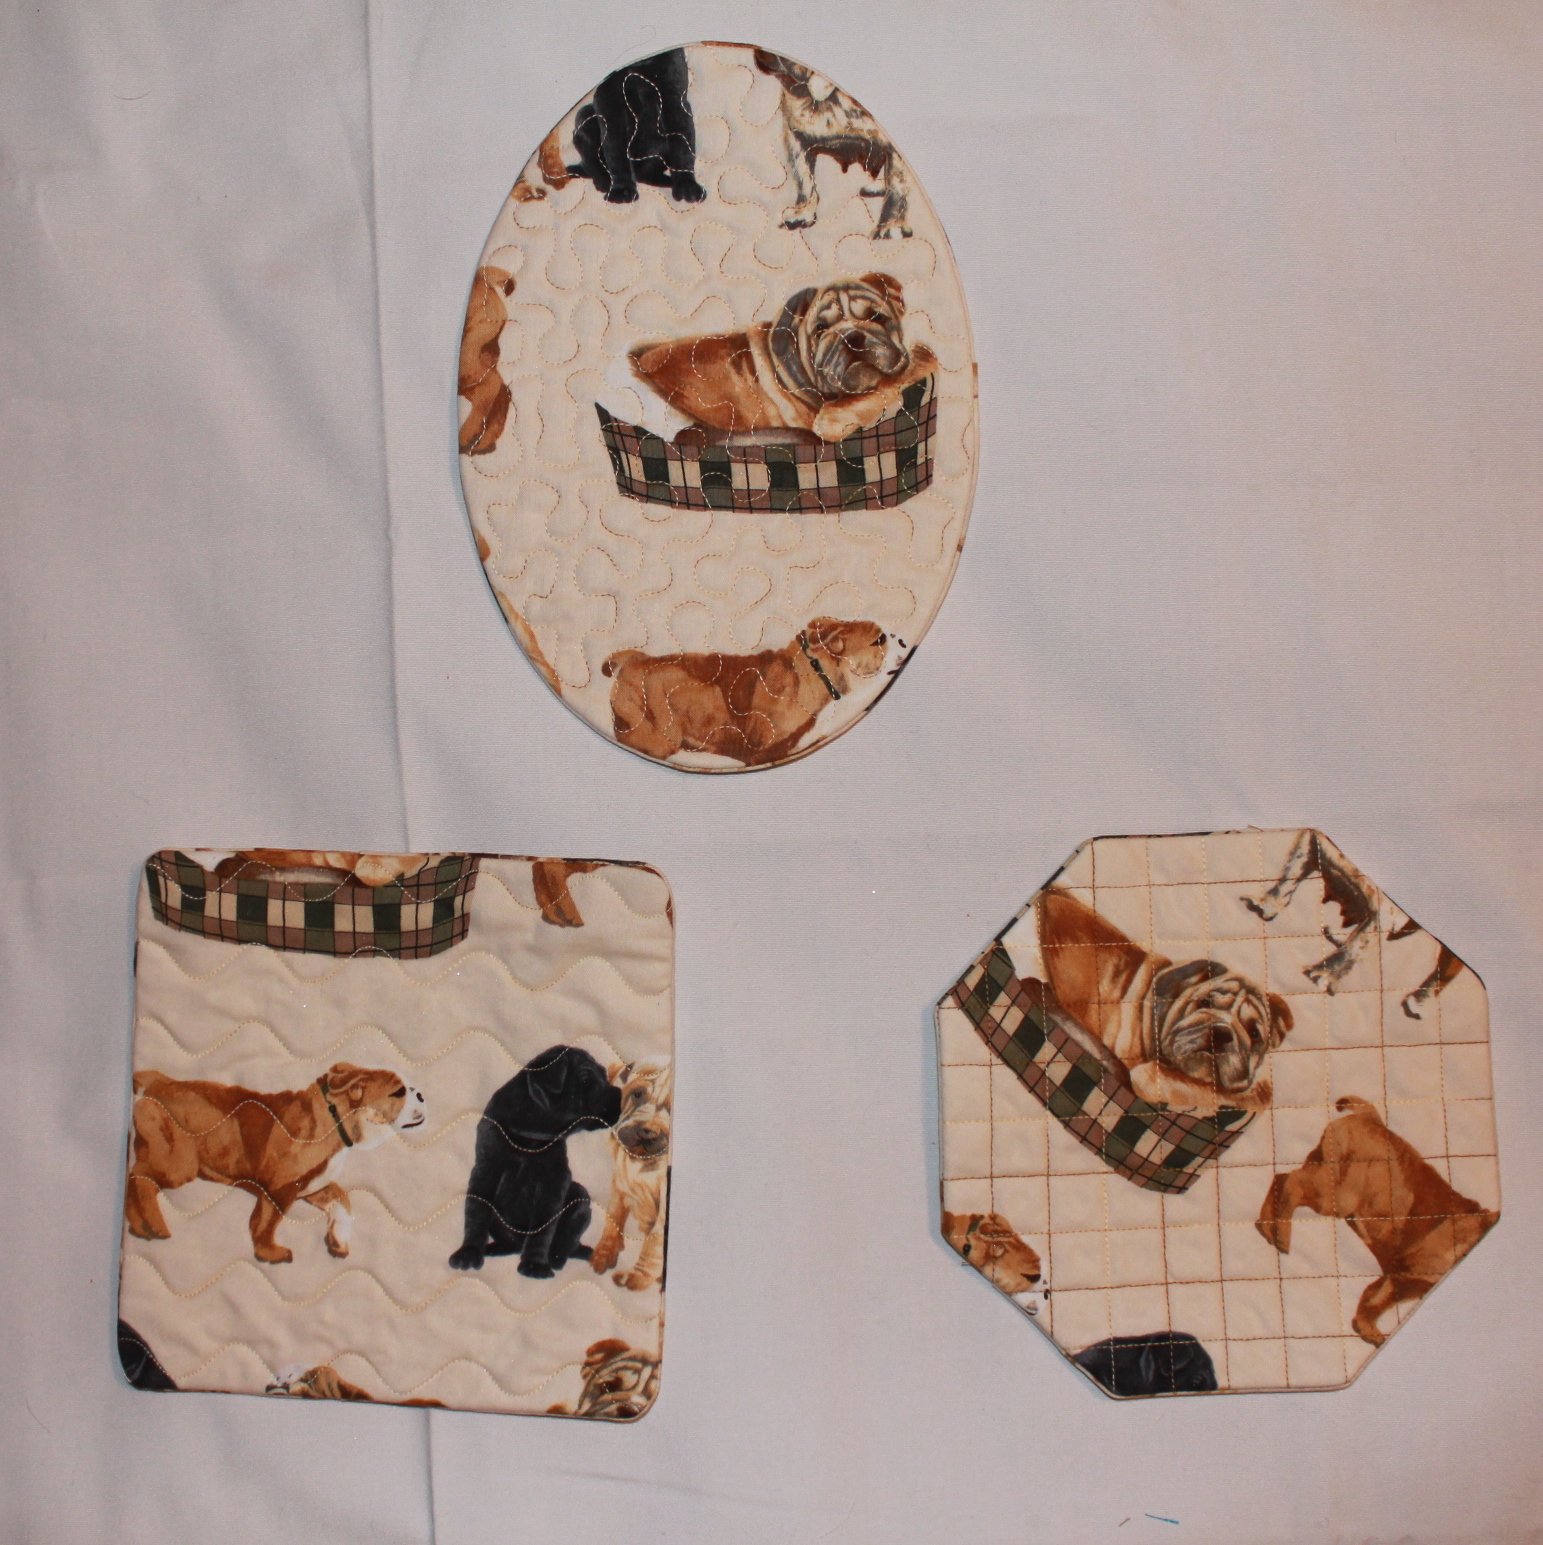
Here are some coasters I made using the same in the hoop design. I just used the circular pattern and used plain cotton batting. I love this fun and colorful Chanukkah print.  I also use this same pattern, to make my monogrammed coasters that I sell on Etsy. The ones pictured there are square but I can make hexagonal, circular, square, oval, rectangular...you name it!

Making gifts for men is always hard. So I was extremely excited when I found this tutorial for a Dopp Kit. I used the basic tutorial as inspiration to make this first kit. On this one I used Decor Bond interfacing on all the main pieces. Decor Bond is what I use in nearly every handbag pattern. It is stiff, but pliable and sturdy. It is fantastic interfacing. However, I felt that it left the Dopp Kit a little too pliable--if that makes sense. In my opinion I think they needed to be stiffer. But when he got the gift, both he and his wife thought it was great that it was flexible as it would pack easier in a suitcase on trips. The choice is yours.
This next Dopp Kit I made using really stiff Peltex interfacing (the one that is fusible one one side) on only two of the four main pieces. And man this thing is stiff stiff stiff! I could hardly bend it to sew through. I think I need to find a happy medium. Any suggestions?
On this gift, I took a ready made tote bag, available at craft stores or here, and put an embroidery design on it. The receiver of this gift is in tap dance classes and this will be a great bag for her to throw her tap shoes and dancing supplies in to carry back and forth from class.
Another baby gift! These are adorable little cowboy boots I made for a baby boy and embroidered them with his name. The pattern is by Curby's Closet. Here is the pattern for the cowboy boots. They have all kinds of baby shoe patterns. Check them out here.
Last, but definitely not least, I made these little snap cases to hold things in your purse. They hold a mini tide stick, pills, anything you want. They are incredibly handy to have around. These are also made completely in the embroidery hoop in one hooping. 

Phew...I think that about takes care of it! All the other gifts I already posted about...man I just got exhausted all over again looking at all these things I made! I'm thinking about having a giveaway soon...what do you all think? What would you like to see me give away???

Sunday, December 5, 2010

Professional Tote 2

I finished the Professional Tote I wrote about in an earlier blog. The pattern is amazing!  It is extremely clever and well put together. I did not have one issue with the instructions. Every time I was supposed to match another piece together, in my head I was like sure this is going to fit--and every time it did! It was amazing! There are so many pieces...it must have taken a very long time to make this pattern. I am an intermediate sewer and believe any sewer who has a pattern or two under his/her belt could manage this pattern. Don't worry...I was not working on it the entire time since I last posted---other projects and deadlines got in the way. I have already started another Professional Tote to give to my mother for Christmas..I will be sure to post it when I finish. So I am sure you are all dying to see the pictures so here they are!

I also had a chance to get the coasters done for the table settings I posted about before. These coasters were as pleasurable to make as the place settings and the whole set together is going to look amazing on my mother's kitchen table. I highly recommend this pattern as well. It is by Deborah Vollbracht of Creative Folk Quilting. As you can see, they are reversible. I put three of them on the other side so you can see this. And guess what the best part is??  The coaster pattern is free! Click on the website link for Creative Folk Quilting I have above and check it out for yourself!

Saturday, November 20, 2010

The Professional Tote Bag

I finished cutting my materials for  The Professional Tote by The Creative Thimble. The fabric and embroidery I am using is so exciting and different! I cannot wait to get started and let you know how it goes. It seems to be a pretty involved bag (check out the description here to see all the cool things the Professional Tote can do) so I will keep you posted on how hard certain steps are or if the going is easy. I can say right now that the cutting went quickly--the layout diagrams were extremely easy to follow and the labels for which pattern piece you are cutting are very helpful. I also added embroidery to key places—you can see I am really personalizing this to my crazy tastes!  The monogram embroidery will be the front pocket. (I digitized this design myself using a font called Moonstar) The vampyr embroidery is for the travel strap that you can use to put the bag over the handle of wheeling luggage.(This design came from Urban Threads, but I tweaked it by removing the leaves and the E and the end of Vampyr...there is no E!)

The skull damask design is for the back pocket. (This design is from Embroidery Library)

I’m so excited to see how this bag will turn out! I started this bag last night at my Sewing Circle and my friend started cutting her bag out. She is using Michael Miller Fairy Frost fabrics in the most gorgeous lavender and purple!  So beautiful...if I make another of this bag I'm definitely going with Fairy Frost fabrics. Probably in yellows and corals.  (I used Fairy Frost fabrics on the table settings I showed you on an earlier blog, the green and the gold, but I chose the few Fairy Frost's that have glitter overlaid on them. Most of the Fairy Frost's just have the beautiful sheen without the actual glitter on them.)

So as a result of last nights sewing circle, I have included pictures of the front and backs of the bag which is as far as I got. It seems to be going along pretty quickly, and I haven't had a single tough spot in the directions so far. I am pleased as punch!
Locations of Site Visitors