Pages

Wednesday, February 22, 2012

Spider Peony

On February 18th, Colette Patterns had a book signing party and trunk show at Sew LA. You could receive 20%  off all Colette patterns but if you wore one of her designs, you could get 30% off! Now I had been planning on making a Peony for some time and had some fabric set aside for it...and guess what? The fabric was red! So not only was it perfect for me to make for the event, I can also enter it into the Red Dress contest on pattern review and use it for the Sew Weekly theme from last week---red. (You can see my entry here. I am not a contributor because I did not know at the time, but I did apply....it said they were still accepting people...but I have not heard anything yet.)
Fabric detail close up---those are not wrinkles! Those are the striped gradation in the fabric

For this pattern, I did make a muslin of the bodice because I know Colette patterns are designed for bustier gals than I. Of course I somehow convinced myself the muslin fit...no idea what I was thinking...and went and sewed it than way. Of course it did not fit! So I made up some changes that resulted in an SBA but it is not the correct way to do it if you do it before you make up your garment. I went to the waist dart and moved the dart legs each in a half inch on each side...so the darts were each 1 inch shallower...and i continued the line up to the same point as before. Seemed to work...because the bodice fits perfectly now. I also altered the bodice to be 1/4 inch longer...or I intended to anyway. I did the front bodice correctly while I was tracing off the pattern...and while I was not thinking, I traced the back bodice off 1/4 inch shorter---I moved the paper the wrong way! So the front and back bodice were 1/2 different from each other. I just eased the back 1/4 inch and cut off the other 1/4 inch so the bodice ended up being the exact same size as the original pattern!

Another change I made was to add piping to the sleeves and the belt....it ended up being a super cute detail but I of course did it because adding piping is yet another way I cheat around hemming!


sleeve piping detail
piping detail on belt and spider broach!
If anyone wants a tutorial on how to use piping in place of hemming let me know...I can do one but I just figure you all know this trick by now. To make this piping, I used the Clover wrap and fuse piping and ironed the Wrights gold lame bias tape around it..ironed on low!  I melted some of it right off when the iron was on high...I also used the Clover mini iron to iron it because it was very hard to use the large iron to press the fabric around the fusible piping. You can see my detailed review of the Wrap 'n Fuse piping here.What can I say? I'm a gadget girl! I love anything that makes it easier and faster...I want my finished garment!  But of course I also want quality...so I am careful to try and strike a careful balance.

Back belt detail
excess belt room


I love this dress so much...I have plans to make another. I loved it the minute it came out...this is actually the first Colette pattern I ever bought and I'm glad I made it work so well. I have a couple more pictures to show you more details.


Awesome shoes...and awesome puppy!


A couple things, the back belt, if you can see in the above picture, pulls some...but its not tight so I dont understand the pulling. I think on the next belt I might try a vertical buttonhole and see if it helps with the pulling because on the pattern, it was a horizontal buttonhole and I am wondering if that is what is contributing to the pulling. Just something to mention.

Also, I wore my fun makeup to match the dress! I only get to wear conservative "court" makeup so often nowadays, I never get to wear to the fun colors so I definitely took advantage of the opportunity. Sarai (Mitnick---Colette Patterns designer) even commented on my matching makeup!
Gold eyes, red lips


Scary close up eye makeup shot!!


This will be the first contest I am entering on PR. I'm excited! It was also the first Sew Weekly post that I made. I hope you all enjoy my entry!  Also, I did this entire project from my stash! Did not buy one new thing for it...crazy! I am not sure I have ever done that before! One last thing of note--can anyone spot the problem with the dress?  It's here in the post...anyone notice it???? 

What do you all think of my fabric? Classy enough? Or too Halloweeny?  I try very hard to strike a nice balance between spooky and elegant---you should have seen my wedding! Perfect example. I think this fabric fits the bill perfectly. Love!

Check out my review on PR here.

Saturday, February 11, 2012

Butterick 5559 and Tutorial on Hemming

My cute Buffy had to jump in the pic


I had been seeing this dress, Butterick 5559 by Maggy London, reviewed for awhile and I had to make it. I read about the difficulties of marking and had doubts about my motivation to complete this dress because marking is my least favorite part! But I took my trusty Frixion pens and marked the right side of the fabric with the tucks. I just folded up the tissue and drew the lines.You can read my review of the Frixion pens here.


If you don't yet know about Frixion pens, they are pens that were originally developed to be erasable by friction. But as it turns out, the heat of the iron erases the marks. (They also wash out) These pens have been a huge hit in the quilting world but I haven't noticed anyone mentioning them in the garment sewing world so I thought I would make a special mention. These pens made marking the tucks so much easier than the routes others had to take and they just iron right out!  Of course I tested on a scrap before I began marking. The only thing is I had to sew all the tucks on each piece before ironing them down so the marks would not disappear...but I don't think it harmed anything. The tucks were not affected at all.
haha...look at little Wednesday's paw

Aren't they gorgeous?
I made a straight size 8 in a golden yellow ponte knit. The trim on the sleeves and the hem is a brown ponte knit. The size 8 is slightly large in the hips and I might go back and take in the side seams a little there but I'll see what you guys think first. The only alteration I made was to take in the lower edge of the armscye in an inch...and therefore made the sleeve smaller at the bottom by one inch. I felt like the golden yellow might be a little too strong all on its own (even though I love it...yellow is my favorite color!) plus my favorite shoes in the world were this color yellow leather with a leopard trim--Marc Jacobs--so I added the brown trimming. I LOVE these shoes...I have had them since early 2005. I even wore them in a torrential downpour, through  tons of puddles, and they looked ruined and the next morning?? pristine condition! That's what you get with great quality...but I digress...as this post is not about shoes!

Another reason I added the brown is because I loathe hemming! And it just made it that much easier to complete the dress. This is a method I use on knits a lot...and I believe its the method used in the new Renfrew top from Sewaholic. I am just guessing based on the ones I have seen--I don't have the pattern..but I want it! I don't know how many people use this method so I thought I would post a little about it. 

First I decided how much brown I wanted to show and ended up cutting a crosswise strip of the brown  at 2.5 inches. I cut crosswise because that was the way the stretch of the fabric went and I needed the stretch to match the hem of the garment where I had the stretch going around my body. Next I ironed the strip in half. Then I placed raw edges of the brown to raw edges (where I want to hem) of the sleeve. I did this on the sleeves before I set them in.
Raw edges together (Sorry the stitching is already there...I did not think to take pictures until it was complete

Then I stitched with a quarter inch seam all the way to the end for the sleeves. For the hem, I measured the amount that was needed and added a half inch for seam allowance and sewed the strip in a circle before placing it on the hem and sewing the quarter inch seam. The circle was not needed for the sleeves because they were still lying flat and not inserted into the garment.

Next press the seams up towards the garment. Then we are going to top stitch extremely close to the seam to hold the inner seam allowance down...and plus it gives a nice finish.  Also a little tip...use your edgestitching or blind hem foot. I am using the blind hem foot here and I set my needle almost as far as you can go to the left...two from the farthest left and ran the center of the foot (the blade) along the ditch.  Below is a picture of my machine settings which show the dot two from the left position so you can see where I had the needle positioned. Also a picture showing how to use the edgestitching or blind hem foot to do this kind of stitching.

my blind hem foot running in  the ditch


machine settings


And this is what it will look like when you are done. Two really close rows of stitching on the inside and the seam allowance on the inside is held down on the inside so it doesn't flop around.

Finished seam from the inside

And now for the big finale! I know you all are dying to see some in person shots of the dress! But first, my bragging shot. By reading all the reviews, I knew matching the tucks at the side seam would be hard...so I paid extra careful attention when matching them up and pinned in more than 5/8's so they would match. If I just pinned at the edge, they would have been out of alignment where the seam was stitched. So because I was forewarned...I ended up with side seams like this!


matched side seams!

And now for the shots on me...I kept my hair out of the way so you could see the neckline on both the front and the back...and don't miss my shoes!
back
Front


I hope this helped someone! And please ignore my giant watch in the picture...I should have taken that off...it is a nice dress after all :-) You can also check out my review of this dress here.

Monday, February 6, 2012

Magna Hoop vs. Snap Hoop

I own both the Magna Hoop and the Snap Hoop. Because my embroidery machine is a Babylock Ellisimo, I was able to get the snap hoop as soon as it came out. I have now used both of them enough times and tried them on a significant variety of projects that I now feel comfortable reviewing them for you all.

My personal preference of the two is the Magna Hoop. Now I can hear all of you screaming your love for the Snap Hoop---the Snap Hoop is great also!  They both work for very different things....it just turns out that the type of embroidery I tend to do more often works great with the Magna Hoop.

So, first things first. Magna Hoop is NOT A HOOP! I think that is the biggest misconception. Magna Hoop only works with the hoops you already own for your machine. Magna Hoop is simply inserts for your hoops. This works well if you are often embroidering on oddly shaped items such as clothing pieces or quilt blocks, purse pieces, towels, etc. It holds the fabric down in the hoop in every area but where you are embroidering. So this gives it more stability than say, just using a sticky stabilizer.
Example of the 5 x 7 Magna Hoop-the other sizes come with different shaped inserts
Here is also a link to a video Eileen Roche (the inventor of both hoops and editor of Designs in Machine Magazine) did on describing the Magna Hoop. I also want to include a link to her blog where she writes about the comparisons between Magna Hoop and Snap Hoop and when and she uses each one and why. That post can be found on her blog here.

Now the Snap Hoop is an actual hoop.


This hoop makes squaring up fabric and getting rid of puckers easier. This is because the top of the hoop is magnetic and does not latch in like normal embroidery hoops. Therefore the fabric can be slid around underneath it until it is square and has no wrinkles. This cannot be done in a regular hoop because of the tightness of its grip and the probability that it will cause puckers if you pull after hooping. Here is a link to Eileen Roche's video on the Snap Hoop.

Now the reason I prefer the Magna Hoop is simply because of the type of embroidery I tend to do. I do a lot of onesies so I bought the 4 x 4 hoop to make hooping square easier. Problem is, it does not hold tight enough for the small 6-9 month onesies I embroider. These are TINY! So I have to pull the fabric all around the hoop and stretch and hold it so the presser foot doesnn't catch it while it is embroidering. With all this pressure, the snap hoop magnets tend to slide whereas the normal embroidery hoop holds everything tight. So the Snap Hoop simply does not work for me for this purpose.


Additionally, the Snap Hoop is not good for applique...which I also do a lot of! You do not want to have a ton of stitches on baby items so applique designs are better than fill stitch designs for baby clothes. The instructions that come with the Snap Hoop even caution about using it for applique because of the potential for the fabric to slip around with the constant removing of the hoop from the machine and manipulation to cut around stitches for applique. However, Eileen Roche has found a solution for this problem. If any of you have any of her Stipple collections, you can see in the videos she does them in the Snap Hoop. Now why does this work?  This is because her applique designs in the Stipple collections are all raw edge. She does layer after layer in the hoop until the entire design is done. Only then does she remove the hoop and cut around all of the edges. By doing it this way, she removes the possibility of the fabric slipping from the constant removal of the hoop from the machine by not removing the hoop until it is done. (You can see this process in a video here.)

This is a great idea if you like raw edge applique! I happen to use the more sturdy satin stitch around the edge of my appliques but again that is because I do a lot of baby items and they get washed frequently and it will hold up better. The kind of items that the Stipple kits make won't need that amount of sturdiness and it works well.

 The point of me writing this post is to make sure you are all well informed on the pros and cons of each item. I still use the Snap Hoop on plenty of other items. It was just that it was not ideal for the main items I had bought it for or regularly do.

Wednesday, February 1, 2012

Black Ponte Pants

I recently decided to participate in the Wardrobe Basics Sew-Along put on by the wonderful Girls in the Garden blog. Our first order of business was what was called the black ponte pant!  Now this could not have come at a more opportune time. I had just received my Silhouette Patterns 3 Piece Yoga Pant pattern and had some gorgeous black rayon poly lycra knit left over from what I used on my bridesmaids dresses (more to come on that later!).

There is the front silly shot of me wearing my new Yoga pants. They fit perfectly and work well with heels which is important for work. Also, they are elastic waistband so they are extremely comfortable. Just like the description of the pattern, the pattern is 3 pieces. A front, a back, and a waistband.

Now I have made tons of pajama pants and I am perfectly comfortable at putting on an elastic waistband. In fact, I make all my pajama pants entirely on my serger. (It is a Babylock Evolve so it has coverstitch capabilities) So I did the same thing here. I used my serger for the entire yoga pant. Only my attempt at putting in the waistband was disastrous! It definitely was not the patterns fault, I think it was the elastic I was using. It barely stretched at all. I got some heavy duty stuff called waist band elastic or something. In the future I will just use the regular pajama or underwear elastic.
back view

So as a result of this heavy duty elastic, the waistband didn't stretch to fit quite properly. So I had to undo the waistband and I stitched it first on the sewing machine and then took it over to be serged and that worked just fine. I do not think I will need that extra step when I use the different elastic next time.

Ok so now for the fun stuff! Any of you who do not yet know about Silhouette patterns, Peggy Sagers, or their webcasts need to go over there stat! I say this because not only are all her webcasts amazingly useful, but she has one specifically on yoga pants! She shows you some neat tricks to get cool different waistbands and even describes how you can use this pattern with a woven for a more professional looking yet still comfortable pant! Now I know you all want a back view to see the fit so...here you go!

I cut a straight size 4 (the smallest size) and made no alterations whatsoever. I thought for sure I would need to shorten the crotch length or make the waist smaller or something! But nope! Not a thing. She even mentions that repeatedly that there are so few alterations people need to make with these specific pants because they are so forgiving. The one thing to take note of though is that the 4 is not marked on the waistband piece for some reason. All the other sizes are. But easy enough, I just used the same measurement as is between all the other sizes and used that to measure where the 4 cutting line would be.

All in all, I had a great experience and I am so excited to have the first item done in the first sew along I have ever participated in. I hope this inspires some of you to make your ponte pants! Lastly, I will leave you all with....

a silly picture of me in my new pants! You can see my review here.

P.S. The pictures on the front of Silhouette patterns displaying the garment are horrendous! HORRENDOUS! Just ignore them and look at the line drawing or a review on PR or on her webcasts. These garments can be truly gorgeous!

Friday, January 27, 2012

Another Wedding Throw

Back in May, a good friend of mine got married and I made her a wedding throw. She loves everything Disney (she had the cutest Cinderella invitations) and she loves butterflies. So I decided to combine those into a throw for her using the embroidery and fabric.

These embroidery designs are from the set here at Embroidery Library. Now let me tell you, these designs are INTENSE! First off, I did not like the color combinations they used because they were not like colors used in the movies. So I went in to edit the colors and it turns out when they used a color, they combined it with all the other items they made in that color (which makes sense to avoid unnecessary color changes). But unfortunately, I wanted the dress in a different color and then all of the sudden it would change the birds too! Because they had set the colors up to make the dress and birds blue. But I wanted a pink dress and blue birds. Argh!

I had to spend hours separating colors and designs and making new color stops in the designs so that I could make them perfect. So what started out as designs that had maybe 27-30 color changes, now morphed into designs with 40+ color changes! Yikes! So you can imagine how long these took to stitch out. Not only that, choosing the colors for each design took awhile and then keeping them in order while they stitched. Each design took easily around 3 hours to stitch. So if you plan on using these designs, keep that in mind. Would I do it differently? No way! These designs are absolutely gorgeous!!  (Make sure to use a heavyweight stablizer--these are stitch intensive)

Here are some close ups.

Snow White

Alice in Wonderland

Cinderella (I did some major sparkle work on that slipper...its beautiful)

Sleeping Beauty

Anyone know who this is? Random princess and prince?


Lastly, here is a good look at the label I made for the quilt.


I don't know if the pictures do this quilt justice. Can you see the pretty fabrics? They are sparkly! And the butterfly I embroidered in the center of each star block? You will just have to take my word for it! And the best part?? She loved it!

Wednesday, January 25, 2012

A Year's Break.....and yet another Professional Tote!

I'm back! I know I took a break for a year but I'm back and going to try to be more regular on posting my projects and also posting reviews on patternreview.com.  The reasons I left for so long, first I got engaged, then married, then honeymoon, then new job....it was all so crazy and blogging fell by the wayside!  I had a Halloween themed wedding on October 29, 2011 and it was incredible! I will post pictures periodically of things we did because it was sooo hard to find Halloween wedding resources and ideas. So if mine can help someone, that is great!


 Anyone who has read my blog from before knows my love of the Professional Tote (see here, here, and here) and I had already made two! Well I made a third last year for my brother to give to his girlfriend on Valentines Day. This one was my favorite of them all.
front
back

I used notions from the Creative Thimble's website (the designer of the pattern) for this bag. I also used her purse feet which work extremely well for this pattern seeing as it is a travel bag and is frequently set on the ground. I also used her cording in lime green, the cord stops in lime green, and the special zipper. This zipper is far more heavy duty and works much better to close up the top of the bag.
heavy duty zipper and decorative stitching
I also used decorative stitching on many of the pieces to add a bit more pizazz!  (As though the fabric was not pizazzy enough already!)
inside view
Everyone who I have made this bag for (myself, mother, and brother's girlfriend) have loved it to death and we use it every time we travel. Or for me, I use it when I go to shows as well to carry all my purchases!  As an update on the one I made well over a year ago--I still use it all the time and it has held up well. No problems whatsoever. Oh wait I lied. There is one problem. I did my embroidery on the front of mine with my initials. Only problem is, I since got married and now have new initials! Guess I have to make another one...... :)

On the next one I make, I intend to try to use this new product instead of the regular Decorbond interfacing. It is called Soft and Stable and I think will alleviate the problem of the fabric separating from the fusible decor bond around the top. (It is hardly noticeable but if I am making another...I may as well try to improve!)

I will also be posting a tutorial soon on how I do the hang ties on the zippers of all my bags so stay tuned!

You can see my review of this pattern here.

Sunday, January 23, 2011

Road 2 CA!

I went to Road 2 CA on Friday and WOW. WOW. This show was amazing! Far better than the International Quilt Show in Long Beach. For those of you not familiar with Road 2 CA, its a large quilt related show that has hundreds of vendors and anything you can dream of to buy...and usually each retailer has a show related deal that is amazing and you cannot get the deal anywhere else. There were a couple of really cool vendors that I want to tell you about.

First off, Little Windows. Ok, now I saw these guys at the Long Beach show and I was only mildly interested. Now, in the last 6 months since that show, I have imagined all these cool things I can do with it and I had a million questions for the vendor when I was there. And guess what? I got it...stay tuned to see what cool things I make with it. I'm not sure about what pictures I can use to show you what it does, since I have not yet made any, so I will just put this one pic I found on google images up and then click on their link above to see all the other cool stuff it does.  You can make anything you can imagine, such as rings, keychains, necklaces, ornaments, anything you can imagine really!
What I plan to do is to make some buttons for this jacket I want to make soon. I got this great black and orange argyle print fabric and I really wanted glittery, heart shaped buttons. Little Windows to the rescue! I plan to make some heart shaped domed pieces with orange glitter in them or an orange glittery piece of paper in it and then drill the holes to make buttons. They will be beautiful!  I can also put some skull pictures in the molds and have fun skully jewelry..all kinds of things. It looks like so much fun!

Also, I have been very into puzzles lately. It has been puzzle after puzzle at my house! So at the show I found all these cool fabric and quilt related puzzles to do. I'm so excited! I don't remember the name of the vendor but they only do shows and nothing online so I cannot refer you to them anyway.


Next I saw this absolutely gorgeous quilt jewelry made of clay. Sooo beautiful! The company is called Quilted in Clay. The colors and jewelry is so vibrant and the quilt blocks and designs are so sharp yet tiny. It's really amazing. I meant to go back and pick up some because I was rushing through on my first run and then I ran out of time!!  But I will be perusing the website and picking something up. Especially since she now makes my favorite quilt block--Snails Trail. The picture to the side is a beautiful brooch.

I also took a lecture on thread while I was there from the owner of Superior Threads. I received my very own Phd. in Threadology. I am now an expert! I had learned all the information before partly from researching many sites and watching the lecture they have posted on YouTube. Hearing it all again is so helpful. So many people do not realize how much of a part thread plays in making your machine and projects run smoothly. Here is one major tip. Use a topstitch needle!!! For everything except knits or extreme thicknesses and layers. For knits use a ballpoint/stretch (same thing) and extreme thicknesses use a jeans needle. Otherwise, for everything, use a topstitch needle!

At another vendor, there were these incredibly cool patterns at this vendor called The Vintage Spool. This spectacular pattern developed as a BOM (Block of the Month) called Happy Hauntings. It is a lot of applique but for someone like me who loves Halloween..this pattern is perfect!  The way it is made is softer, muted colors and made to go with many kinds of decor. Even more my style is their new pattern called Eeeek! If you go to the link, the quilt is the second picture down and so bright and colorful! And with a little vampire and my favorite part??  The poisons at the bottom...so cute!

Lastly, I bought this pattern I had been dying for since the Long Beach show when I for some reason passed it up. (What was I thinking??) I hunted it down at this show and purchased is pronto!  Its by Java House Quilts and it is called Pieceful Pet Beds. Now they are probably too small for my doggies so I will make them larger. But still the perfect way to combine my love of sewing/quilting with my love of my dogs!

And what a perfect segway!  I feel like this is the perfect moment to introduce you all to my doggies!  When I make these beds...it will be for them!
This is my little Buffy being all cute and behaving herself in one of the beds in my sewing room.
Here is Princess hiding under the covers being adorable
And here is Bronco just hanging out. Sorry this picture is so bad..it came off my phone..I just love the picture!


So in closing, the Road 2 CA show was great and I hope you guys check out these new vendors and items that I just learned about. The way I learn about new things is either from shows or other blogs and internet sites so I hope to be able to pass a little of that along to you all. 

P.S. Let me know in comments what you think about Sizzix. I checked it out at the show and now it looks like it is not very fabric friendly? Is it? Is Accuquilt better?  Does anyone have either of these? I'd love to hear from you. Thanks!

Tuesday, January 18, 2011

Holiday Insanity

In this post I am going to post nearly everything I made for the holidays as gifts  for people so you can see why I disappeared for nearly a month in recovery! This post will cover everything I made that I did not already post about. if it gets too long, I may have to split into two posts. Ready?  Here goes...


 Let's start with the Professional Tote. Yes, I have made several posts about this amazing bag,  and here is another one I made for the holidays. On this one, I added additional short straps to the top to accommodate the way my mother carries her luggage through the airport. The other straps would have been too long to use and the bag would have been dragging along the floor. So I added these little straps. And then below we have the back view.


Next, we have the Serged Satchel by Indygo Junction. I made this bag using Cappucino Bali Pops and YLI's candlelight thread in the loopers. This thread is truly sparkly and gorgous! It is too thick to go through a needle so you can only use it in the loopers of your serger, for couching, and in the bobbin for bobbinwork.
 
Next, I embroidered a makeup bag with a cute hearts and rickrack design. These makeup bags come in two sizes and a ton of different colors and are great for embroidery. Plus, they are lined with vinyl to make wiping down easy for when your makeup spills all over! You can get them from The Sewphisticated Stitcher.

I also made another purse like the one you saw previously in my Quilt with your Serger tutorial. However, with this one, I shrunk the pattern by 40% (so it is 60% of its original size) and then continued to construct the bag. I also added embroidery and hot fix crystals on this smaller version. You can get the pattern for this bag here.
This next photo is of a casserole carrier I made using insulated batting so it will keep any dish cold or hot. This insulated batting is called Insul-Bright and is great for use in your hot pads, iron cases, oven mitts, etc. Keep reading for another gift where I used this batting. 
 The inside ties with ribbons so it can accommodate many different sizes of casserole dishes. 

I also embroidered many ready-to-wear shirts with various embroidery designs I knew the designated gift receiver would like. If you want to know where I got any of these embroidery designs, leave a comment or contact me and I will tell you...I'm just worried this post will get obscenely long if I go through every design I used!

 For this next one, the gift receiver goes to University of Pittsburgh and I looked on their website and they make a hoodie and shirts with Pitt just like this! So I used a Varsity font and an applique/outline stitch and re-created it for her!


And what post would be complete without something about babies???  Here are two onesies I embroidered for very special boy babies. Love those alien designs!

The next item is a two zippered makeup pouch. I also sell these on my Etsy site here. They are custom made and totally functional and can hold so much! This case is always special made up in someone's name.
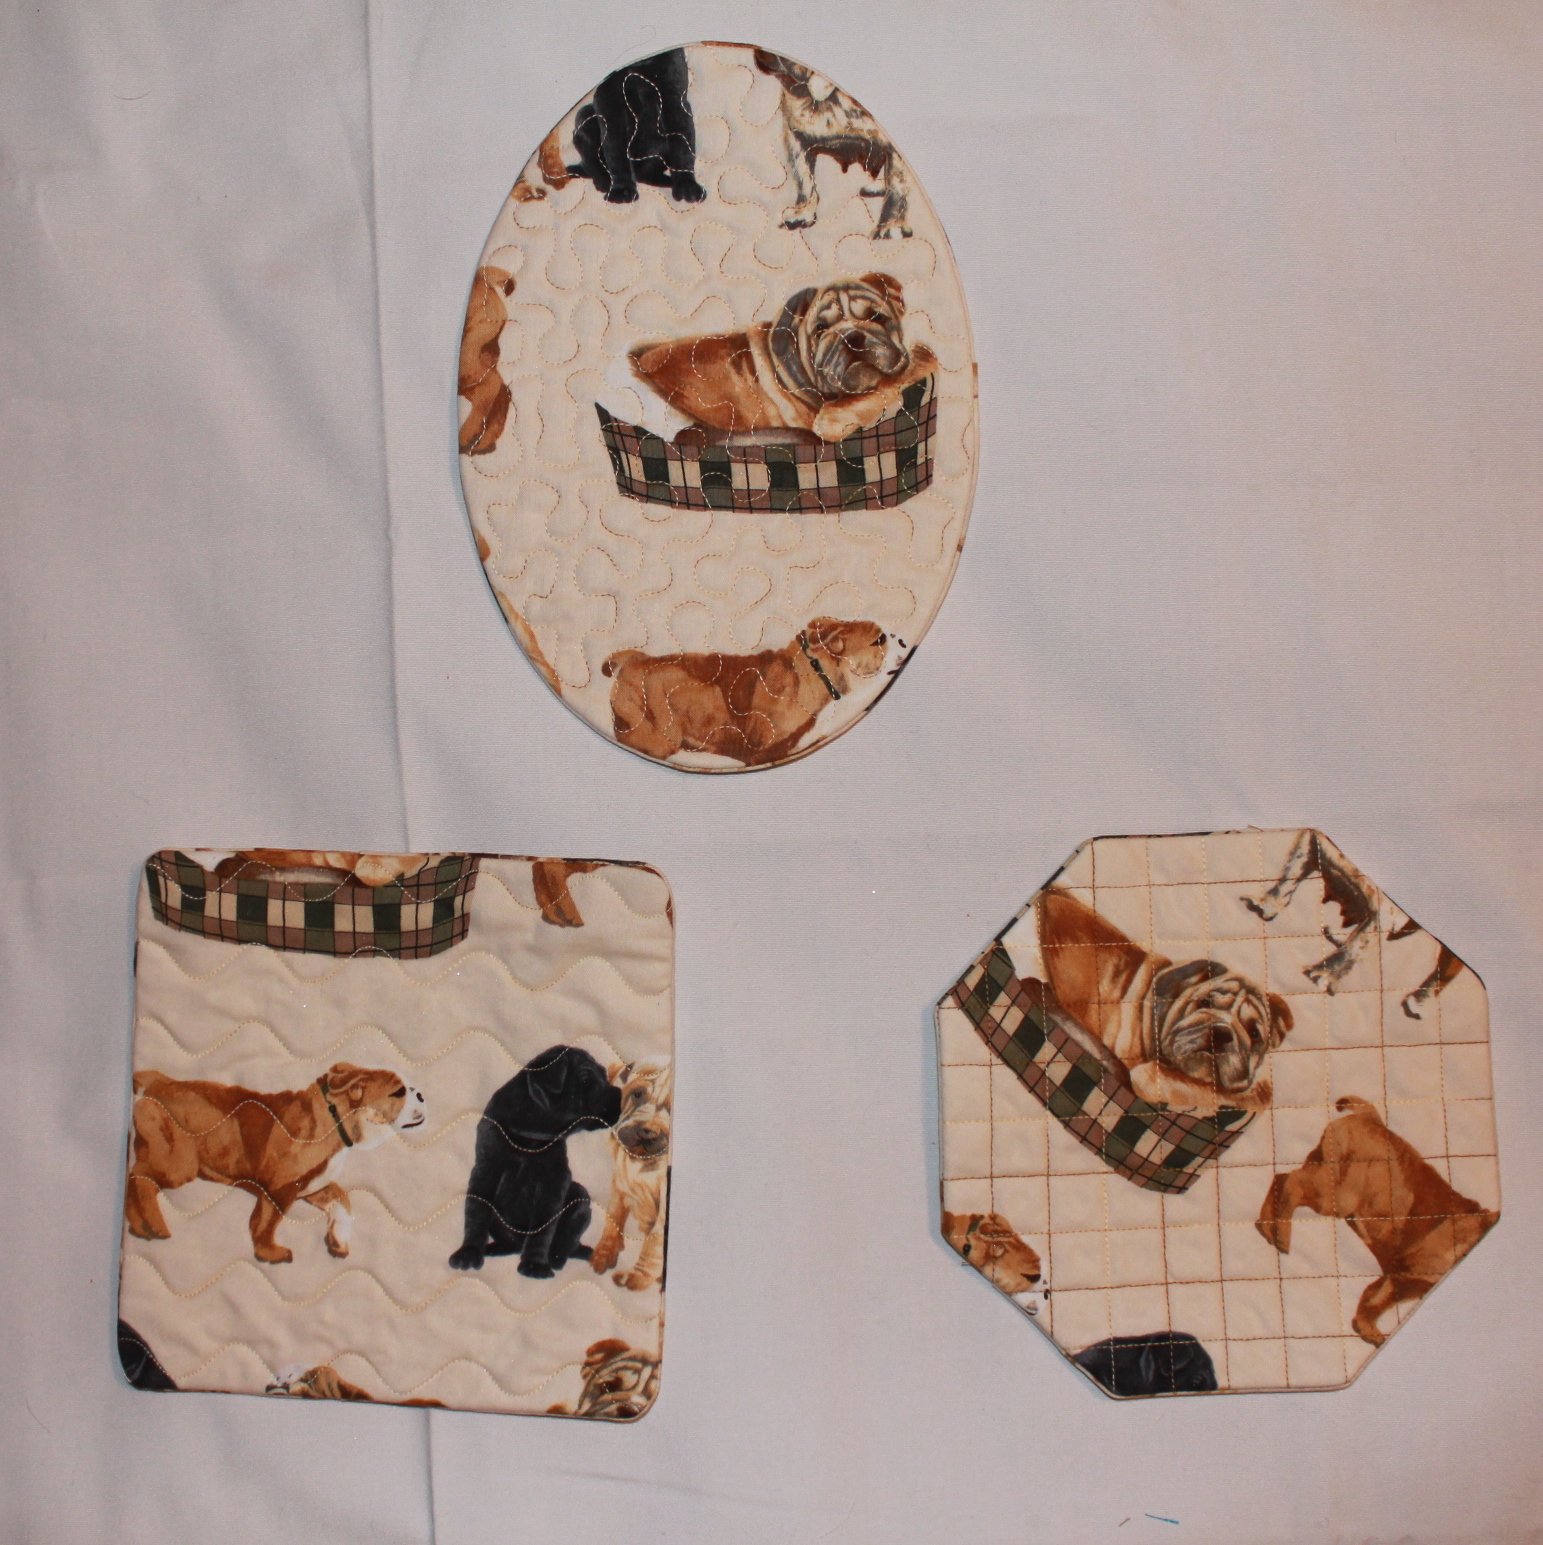
Now we have another Insul-Bright gift! Here are two sets of trivets I made. These are made in the embroidery hoop, quilting in all, in one hooping! I used fabrics to match the kitchens of the receivers and instead of using regular cotton or polyester batting, I filled them with the insulated batting. This way they can be used as trivets.

Here are some coasters I made using the same in the hoop design. I just used the circular pattern and used plain cotton batting. I love this fun and colorful Chanukkah print.  I also use this same pattern, to make my monogrammed coasters that I sell on Etsy. The ones pictured there are square but I can make hexagonal, circular, square, oval, rectangular...you name it!

Making gifts for men is always hard. So I was extremely excited when I found this tutorial for a Dopp Kit. I used the basic tutorial as inspiration to make this first kit. On this one I used Decor Bond interfacing on all the main pieces. Decor Bond is what I use in nearly every handbag pattern. It is stiff, but pliable and sturdy. It is fantastic interfacing. However, I felt that it left the Dopp Kit a little too pliable--if that makes sense. In my opinion I think they needed to be stiffer. But when he got the gift, both he and his wife thought it was great that it was flexible as it would pack easier in a suitcase on trips. The choice is yours.
This next Dopp Kit I made using really stiff Peltex interfacing (the one that is fusible one one side) on only two of the four main pieces. And man this thing is stiff stiff stiff! I could hardly bend it to sew through. I think I need to find a happy medium. Any suggestions?
On this gift, I took a ready made tote bag, available at craft stores or here, and put an embroidery design on it. The receiver of this gift is in tap dance classes and this will be a great bag for her to throw her tap shoes and dancing supplies in to carry back and forth from class.
Another baby gift! These are adorable little cowboy boots I made for a baby boy and embroidered them with his name. The pattern is by Curby's Closet. Here is the pattern for the cowboy boots. They have all kinds of baby shoe patterns. Check them out here.
Last, but definitely not least, I made these little snap cases to hold things in your purse. They hold a mini tide stick, pills, anything you want. They are incredibly handy to have around. These are also made completely in the embroidery hoop in one hooping. 

Phew...I think that about takes care of it! All the other gifts I already posted about...man I just got exhausted all over again looking at all these things I made! I'm thinking about having a giveaway soon...what do you all think? What would you like to see me give away???
Locations of Site Visitors